Introduction
Dokploy is a free, self-hostable Platform as a Service (PaaS) that simplifies the deployment and management of applications and databases.
It’s a great tool for deploying multiple apps to a either a single or multiple DigitalOcean Droplets.
It has many features including:
- Deploy any type of application (Node.js, PHP, Python, Go, Ruby, etc.).
- Create and manage databases with support for MySQL, PostgreSQL, MongoDB, MariaDB, and Redis.
- Automate backups for databases to an external storage destination.
- Native support for Docker Compose to manage complex applications.
- Scale applications to multiple nodes using Docker Swarm to manage the cluster.
- Has a self-hosted option including a managed option if you prefer to pay for the service.
- And more…
Before you start first spin up a DigitalOcean Droplet and secure it using the steps here.
Install Dokploy on your server
After you spin up a droplet you can install Dokploy using the following command:
curl -sSL https://dokploy.com/install.sh | sh
This script will install docker and the containers you need to run Dokploy.
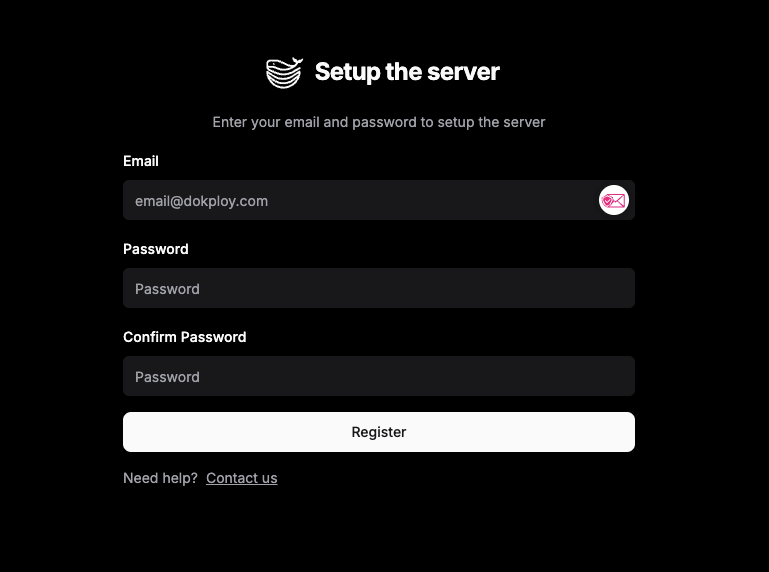
At the end of the installation it will spit out the URL to the admin dashboard, e.g. http://<your-droplet-ip>:3000.
Make sure you go there and set up your admin account with a strong password.
Note that if you followed the steps in this post and created a DigitalOcean Cloud Firewall you’ll need to add port 3000 so you can access the Dokploy interface:
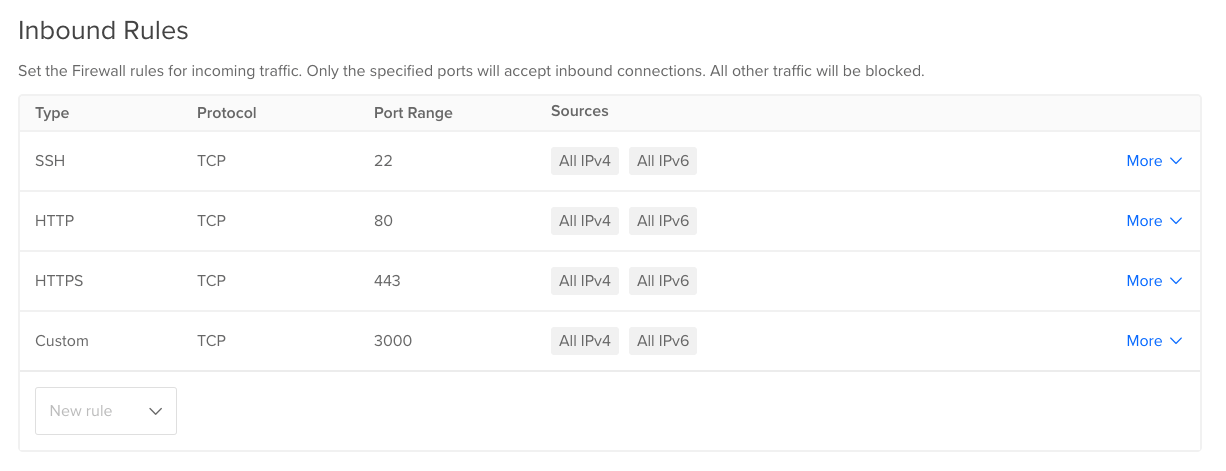
Note: if you’re adding a domain to access your Dokploy server (settings for this found in “Web Server” > “Server Domain”) you can remove this port from the firewall after that’s done.
Create a database
If you’re using an external database, for example a managed DB you can skip this step.
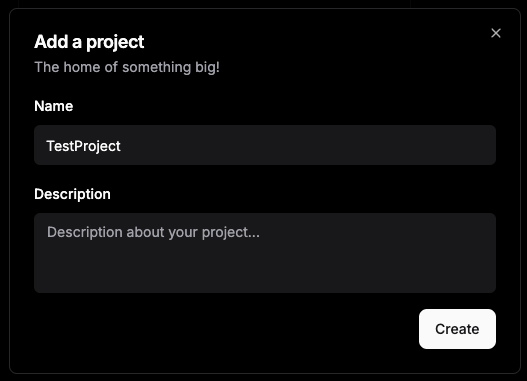
First create a new project:
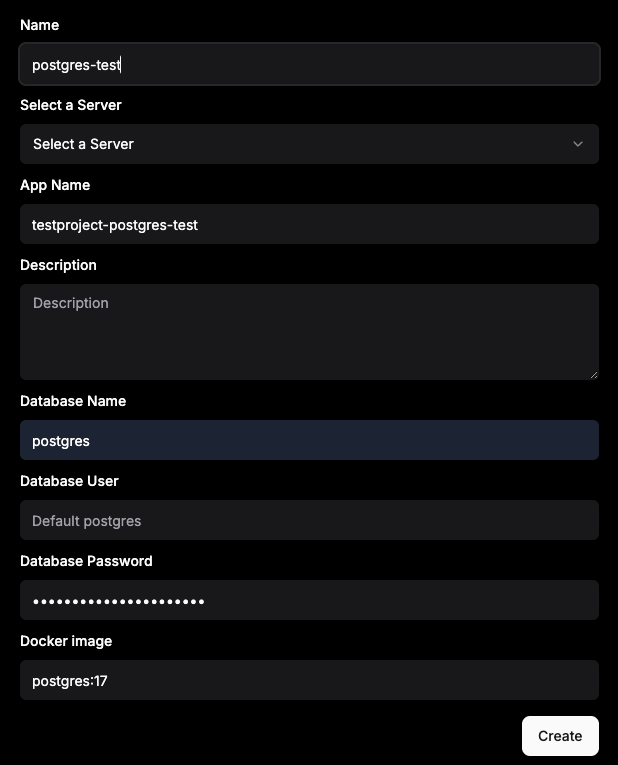
Then click on “+ Create Service” > “Database”. For this example I’ll use postgres, fill in the required fields
Then click “Deploy” and wait for the database to be created.
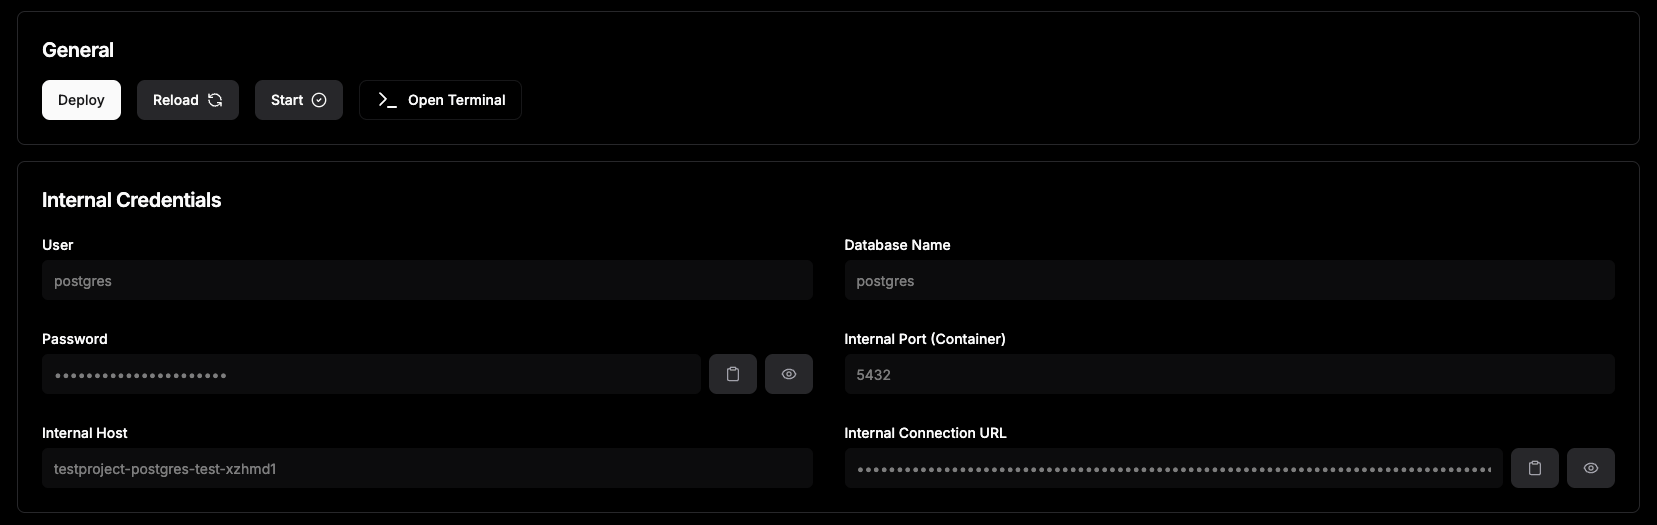
From this screen you can also copy your database credentials, or a full connection string depending how your app is configured.
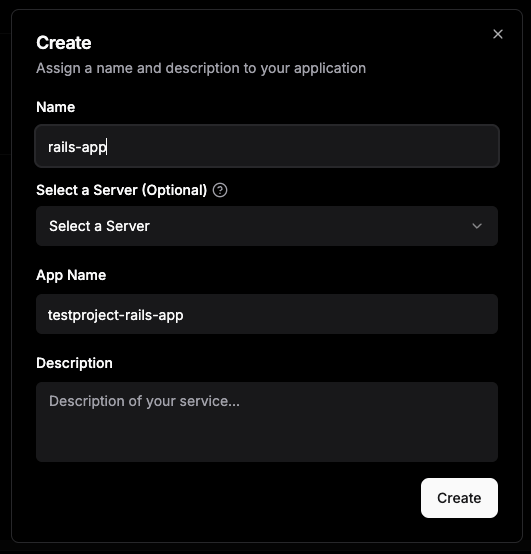
Create a new app
Next click on “+ Create Service” > “Application”.
For this example I’ll use a Rails app, but you can use any type of application.
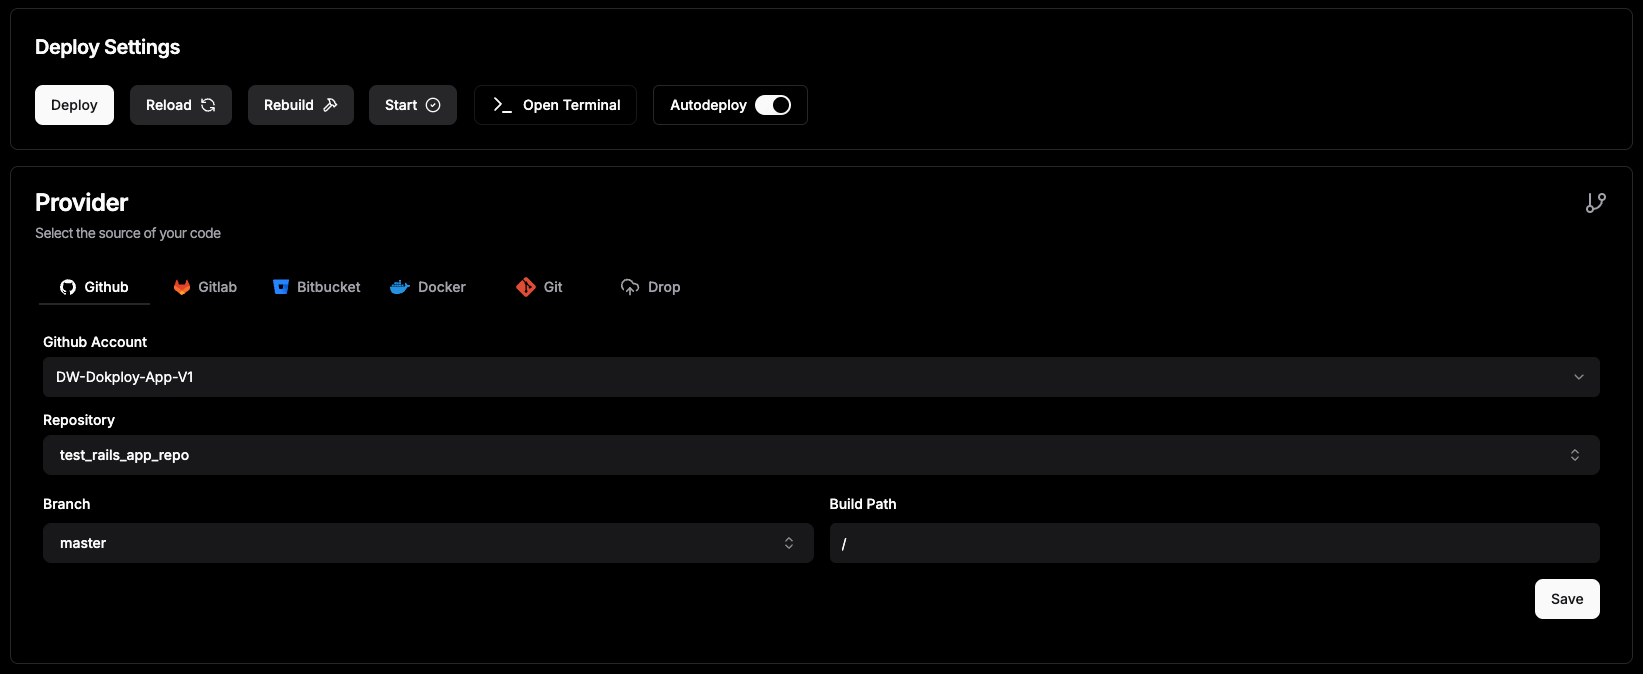
For this app I’m going to deploy it from my Github repository, other options include Gitlab, Bitbucket or a generic Git repository, or to pull and image from a Docker Container Registry.
After selecting Github go through the steps to create a Github application and give it the required permissions. I usually only give it access to the repo I want to deploy from.
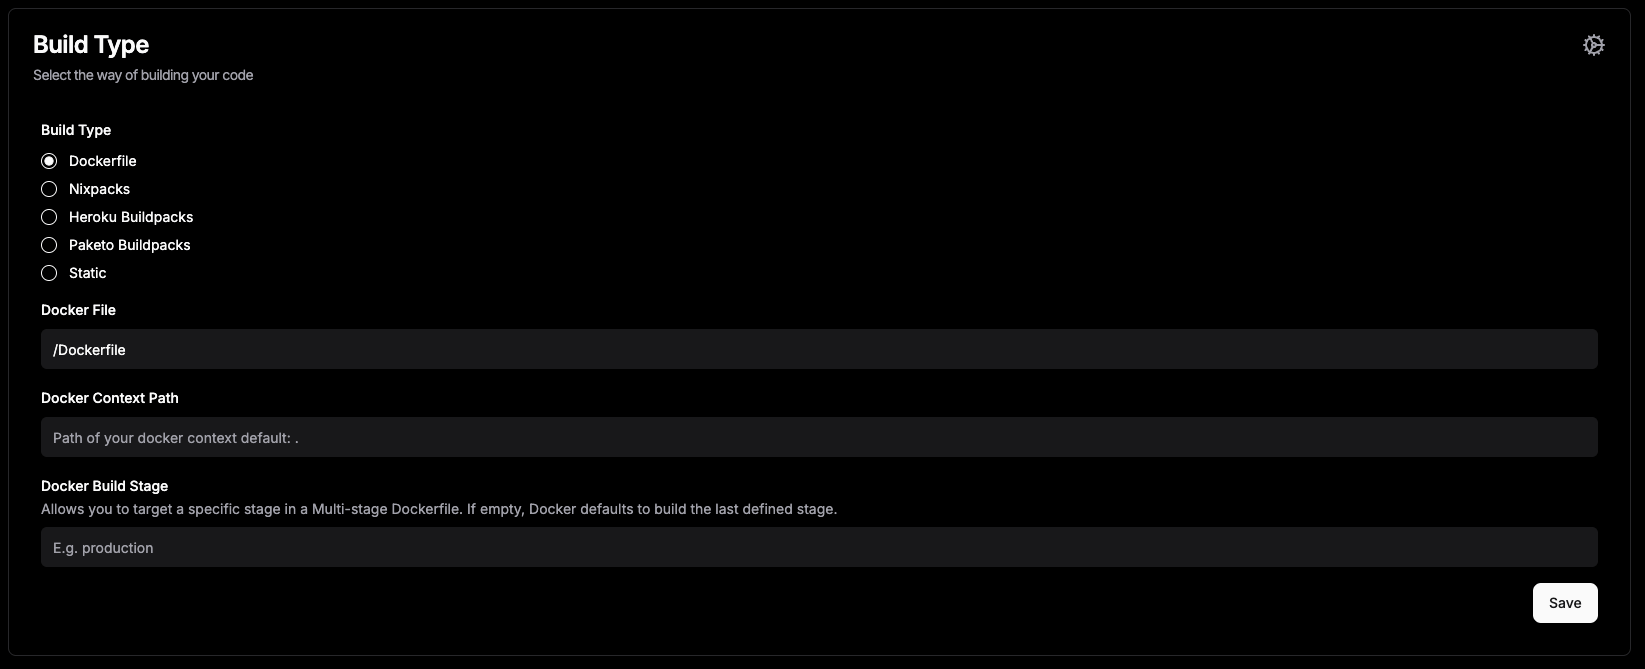
Once you’ve done that there are multiple ways to build your application. Since I have a Dockerfile in the project I’m going to select that, but if you don’t then “Nixpacks” is a good option.
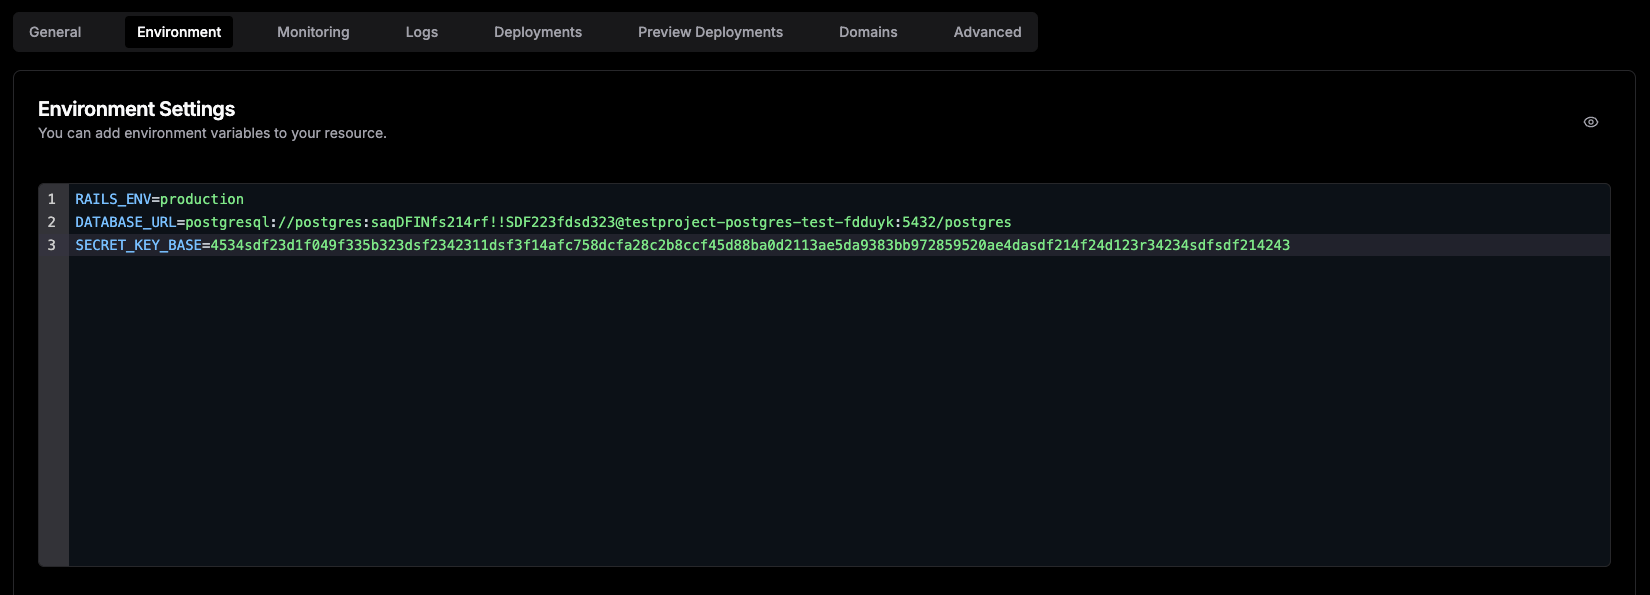
Before deploying the app we’ll need to set some environment variables so that it can connect to the database.
Go to the “Environment” tab and click the eye icon so that you can update your variables. In this example I copied the database connection string from the service we deployed in the previous step. Make sure you press “Save” when you’re done.
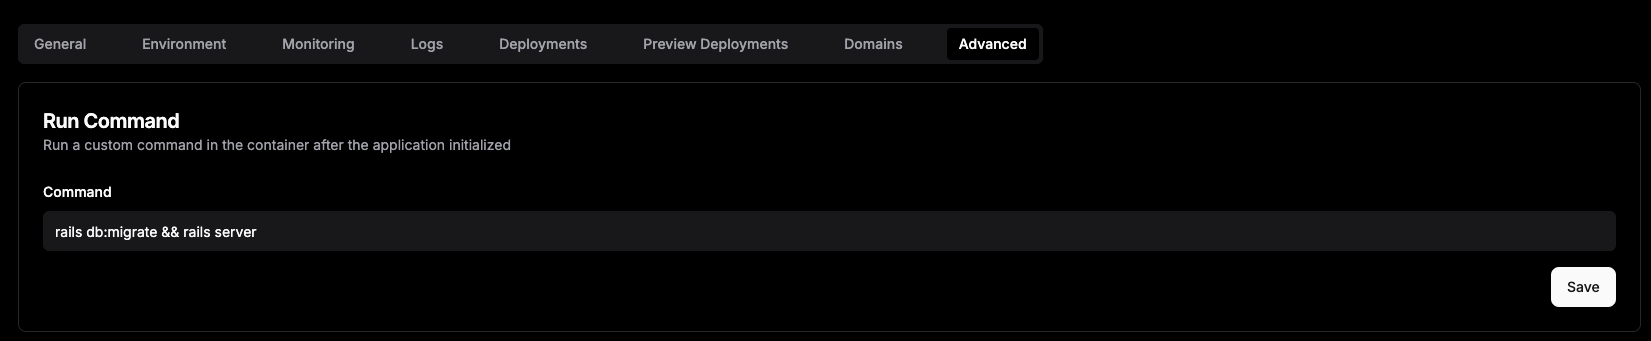
You’ll also want to configure the run command for the container in the “Advanced” tab, in this case I’m migrating the database first then starting the server (./bin/rails db:migrate && ./bin/rails server):
To deploy the app go back to the “General” tab and click on “Deploy”.
After the app is deployed go to the “Domains” tab and click “Add Domain”. Note that in my case I had to enable HTTPS to reach the app.
For testing purposes we’ll generate a free domain, but this is where you would add your own domain if you’re using one.
Make sure the port is set to your app’s port (for Rails usually 3000).
Once generated you can visit that URL and you should see your app running!
Zero-downtime deployments
For zero-downtime deployments you can follow the Dokploy documentation here.
Go to the “Advanced” tab and click “Swarm Settings”, then paste the following in the “Health Check” field, making sure the route is pointing to your app’s healthcheck endpoint:
{
  "Test": [
    "CMD",
    "curl",
    "-f",
    "http://localhost:3000/up"
  ],
  "Interval": 30000000000,
  "Timeout": 10000000000,
  "StartPeriod": 30000000000,
  "Retries": 3
}
And this in the “Update Config” field:
{
  "Parallelism": 1,
  "Delay": 10000000000,
  "FailureAction": "rollback",
  "Order": "start-first"
}
Click “Update” and re-deploy your app.
If working correctly you should see a “(Healthy)” status next to your running container (accessible from the sidebar “Docker” tab):

Conclusion
Dokploy is a great tool for deploying applications to a DigitalOcean Droplet. It’s easy to use and has a lot of features that make it a great choice for self-hosting your deployments.
There are more advanced features as well, such as monitoring, notifications, custom Traefik config and automated backups for your databases so that you can build a really robust deployment pipeline.